Symptom Checker WebCore
Javascript Library
Symptom Checker WebCore (SCWebCore) is a javascript library for building symptom checker applications. It provides convenient methods for requesting content from the Symptom Checker API, as well as handling lots of common business logic for symptom checker applications. SCWebcore is highly configurable and provides programming interfaces for:
- Providing a summary of each symptom checker encounter
- Extending and overriding triage logic
- Searching for topic titles and keywords
- Localizing user interfaces for all Symptom Checker API locales
- Requesting and caching content from the Symptom Checker API
Example Implementation
SCWebCore is accompanied by an angular.js reference implementation.
View the Demo page to see the example implementation embedded within a mock healthcare website.
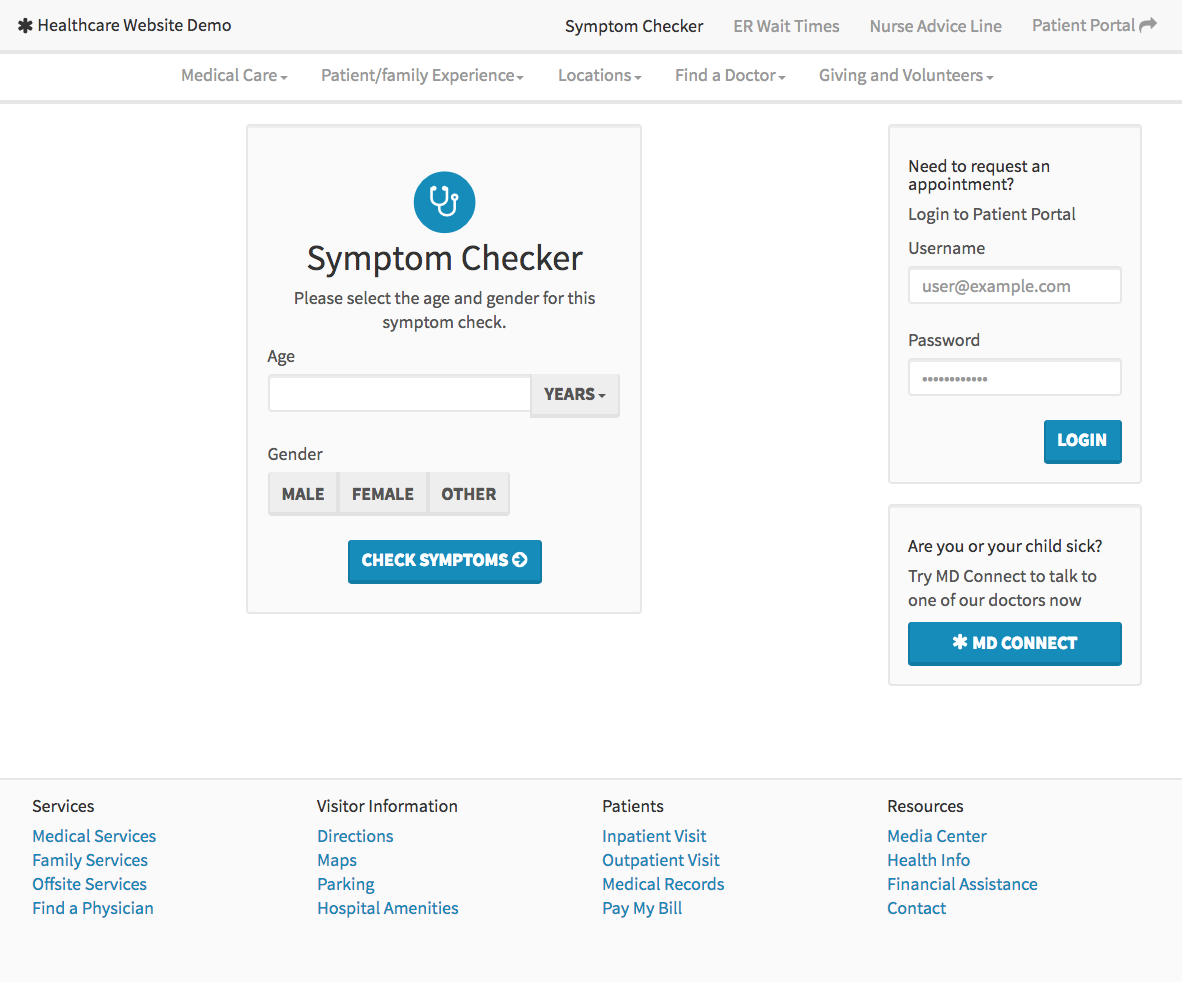
View the Standalone version to preview the example implementation on a page of its own.
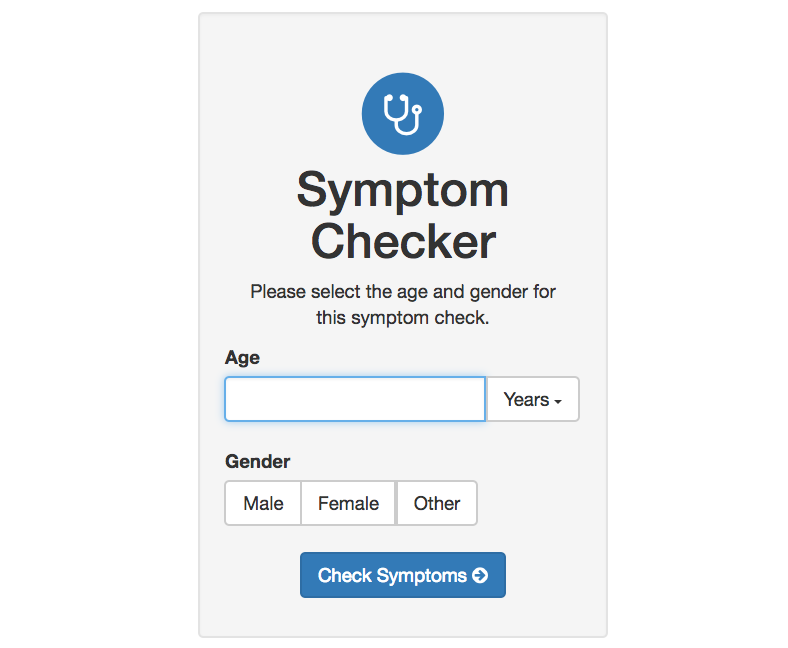
The application user interface features:
- Symptom checker index with alphabetical, body area list, homunculus and keyword search options as well as filters for age, gender
- Tabular symptom checker topic view with breadcrumbs and modal triage instructions
- Dosage table indices for adult and child
- First aid topic index sorted by life-threatening, alphabetical
- Supplemental information index including instructions for users, disclaimer and information about the Authors and Reviewers.
- Dosage, image and special topic views.
- Responsive design, supporting modern mobile and desktop browsers for mouse and touch interactivity
- Google Analytics screen views and event tracking implemented throughout application
The project features:
- Development and production build processes and configuration options
- Complete application source code with jsdoc, readme and documentation website
- Simple configuration of your Symptom Checker API credentials
- Localized Interfaces to support multiple languages
- 16 scss-based bootstrap starter themes from bootswatch
- Adult male, female and child SVG+jquery homunculus interfaces for searching symptoms by body area
The example application's development environment utilizes common frameworks and workflows to provide a highly-extensible foundation for symptom checker application development. These frameworks include:
Getting Started
This project targets the current stable version (6.9.5) of nodejs. You can download nodejs here. You will also need to have bower and gulp installed
npm install bower -g && npm install gulp -gBefore you can build and run the application you will need to install the project's node and bower dependencies.
npm install && bower installThe gulp command will run the application's development build process. This will clean and build the application, start a webserver, launch the app in your favorite browser and watch it's source code for changes.
gulpTo build the application for production, append the --production flag when invoking gulp.
gulp --productionThis will clean the build folder and run the production build process, producing minified resources and references.
Basic Implementation Guide
- Fork the repository and customize the example application.
- Customize the build time configuration options in
config/all.js - Customize the interface with scss in
app/scss/app.scssor reference your own bootstrap theme. - Customize the angular application's business logic. Define triage options specific to your organization within
app/config.js
- Customize the build time configuration options in
- Build the application for production. Make sure you that have installed the dependencies and run the
gulp --productioncommand. - Copy the contents of
dist/(img/,js/,css/,bower_componentsandresources/) to wherever you would like to host them on your webserver. - Copy script and css references from
/dist/index.htmland paste those references into the html page where you would like to embed your symptom checker application. If you already have a compatible version of any of the dependencies referenced (perhaps bootstrap or jquery) then you do not include a new reference. If you are already using another incompatible version of jquery, be sure that you are using jquery in no conflict mode. - We have also provided html meta content engineered for a symptom checker that you might want to copy to your host page.
- Insert the element
<section data-ui-view class="container-fluid sc-webcore">Loading...</section>for your symptom checker application to bootstrap into. When dist/js/app.js is loaded, your application will appear in this section.
Application Configuration
This project's build process is managed by gulp and the options stored in the config/ module. Gulp will use the default development environment build task (unless you provide the --production flag). This would merge config/development.js with config/app.js to provide the configuration for each of the development gulp tasks. The production flag will minify all of the script and css resources and will not spawn development-specific gulp tasks.
You should declare all of your configuration options in config/all.js. You can provide any SCWebCoreConfiguration object in the app property of config/all.js.
Configure API Credentials
You will need to supply an api key file in the root of your project. You can download this api key file from the Symptom Checker Developer Portal. If you would rather put the values directly into your config/all.js, you could do that too. Just define your public_key and private_key for authenticating with the Symptom Checker API. Your api key is found in the Credential Manager in the Symptom Checker Developer Portal.
app: {
    ...,
    public_key: 'your public key',
    private_key: 'your private key'
    ...
}
Configure Age Groups
The age_groups configuration option accepts an array containing one or both of the following strings:
- adult
- child
If you have licensed only the pediatric content or would like to build the application for pediatrics only, provide only the child option.
app: {
    ...,
    age_groups: ['child'],
    ...
}
The order in which these strings are specified in determines the default age group if no age group or age in days is indicated by the user. To default to the adult age group, make sure to list adult first.
app: {
    ...,
    age_groups: ['adult', 'child'],
    ...
}
Configure Language
If you would like to build the application for a specific language, you should utilize the language_code configuration option to specify the language code. See Locale.SupportedLocales for an enumeration of valid language codes.
app: {
    ...,
    language_code: 'en',
    ...
}
Configure Homunculus
The example application provides support for three different sets of interactive homunculus interfaces. The three sets are named 1, 2 and 3. The default set is homunculus 2, the light skinned version of our latest homunculus. If you would like to change the homunculus set, specify the name with the homunculus configuration option.
app: {
    ...,
    homunculus: '2',
    ...
}
You can further customize your homunculus by changing the colors provided by the getColors() function of the homunculus service found in app/services/homunculus.service.js.
| Name | Description | Child | Female | Male |
|---|---|---|---|---|
| 1 | Homunculus 1 has a solid fill color that lends itself well to brand customization. The highlight layers are semi-opaque and typically have a white fill color. The figures in the artwork are wearing somewhat loose fitting clothing. |  |
 |
 |
| 2 | Homunculus 2 has a light skin color and shadows that provide extra detail on the figure. The figures are not wearing clothes and genitals are not featured. |  |
 |
 |
| 3 | Homunculus 3 is a dark skinned variant of Homunculus 2. |  |
 |
 |
Configure Custom Resource Paths
If you plan to embed the example application at a url that is not the parent directory for the rest of the application's resources (everything found in dist/), you should use the base_path configuration option to specify the path to where you will host the application's resources.
app: {
    ...,
    base_path: 'the path to the applications resources',
    ...
}
Configure Google Analytics
The example application includes a Google Analytics implementation. See analytics to review the event and screen name information for the implementation. To provide your own Google Analytics property, supply the property id in config/all.js as the app.analytics_id.
app: {
    ...,
    analytics_id: 'YOUR-PROPERTY-ID',
    ...
}
Configure Autoscrolling
The example application attempts to scroll to the top of the application when the user navigates between views. If your website has a sticky top header, use the autoscroll_clear_selector configuration option so that the application knows to offset its scrolling by the height of the header. If your site does not have a sticky top header, do not use this configuration option (remove it).
app: {
    ...,
    autoscroll_clear_selector: '.some-css-selector',
    ...
}
Interface Customization
SCSS
This application is styled with scss and twitter bootstrap. It utilizes the bootswatch family of bootstrap themes to make it quick and easy to create a bootstrap theme for your brand. Check out the various themes and choose the closest one to your brand as possible. If you already have a bootstrap 3-based bootstrap theme, then you can edit your app/index.html to reference it instead.
If you want to change more than style information you will need to edit the provided angular.js templates. app/views contains the angular templates for every view in the application. Each view has a corresponding controller in app/controllers for managing its view model.
Angular and Bootstrap Templating
If you want to change more than just the style of elements within the example application, you will need to edit the angular templates found in app/views. See the angular templates guide for more info about getting started with angular templates.
Each view is an html file. These views use basic components from the twitter bootstrap css framework.
CSS Namespacing
If you embed the example application on your host page and find that your host page and the example application have many more css conflicts than you would like to sort out, you might choose to build your application's scss within some namespace. You could use .sc-webcore as the scss parent, but we suggest that you use the most concise class name available on your host page. Using css namespacing will bloat the css for the example application.
To namespace your css wrap the entire app/scss/app.scss file in whatever css selector you would like to use for your namespace.
.sc-webcore {
    /* all of your scss */
}
You will also need to make sure that your css selector is implemented on your html page. It will need to be applied to the <section data-ui-view...> element that you have added for the application to appear in.
Project Structure
├── License.md - the license information for the project
├── Readme.md - this file, the main readme for the project
├── app - the source code for the example application
|   ├── config.js - the angularjs application configuration file
|   ├── controllers - the controller logic for each view model in the angular application
|   ├── directives - a few angular directives that are used throughout the angular application
|   ├── filters - a capitalize filter for title casing interface strings
|   ├── index.html - the html template for the angular application
|   ├── init.js - the angular application initialization
|   ├── resources - a touch icon for the angular application
|   ├── routes - the route configuration for the angular application
|   ├── scss - the scss for the application
|   ├── services - the service classes for the application (application singletons)
|   └── views - the views for the application
├── bower.json - the bower package manager configuration file
├── config - the config module for the application and each of its build configurations
├── demo - the source code for the example application demo page
|   ├── ...
|   └── demo.html - the demo page layout
├── dist - the project's build directory
├── docs - the documentation for the project
├── gulpfile.js - the applications build process declaration
├── homunculus - the assets for the symptom checker homunculus interface
├── jsdoc.json - the jsdoc configuration file for the project
├── lib - the source code for the SCWebCore library
|   ├── ...
|   └── dist - the library's build directory
├── licenses.md - the license information for all dependencies of the project
├── package.json - the node package manager configuration file for the project
└── tutorials - all of the tutorials for the project
Support
Contact support@selfcare.info